Linux on the Toshiba Satellite M35X-S114
Author: Michael Minn (see www.michaelminn.com for current contact info)
October 1, 2008
Describes how to set up Fedora Core 5 Linux on a Toshiba Satellite M35X-S114 notebook computer.
1. Introduction
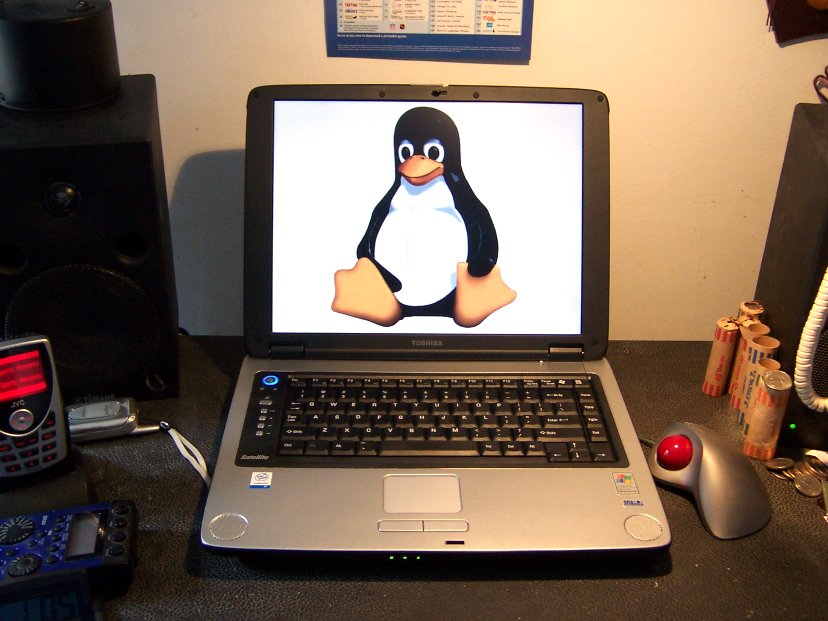
The following document describes how I set up Fedora Core 5 Linux on a Toshiba Satellite M35X-S114 notebook computer. The Toshiba M35X-S114 is an entry-level laptop manufactured in early 2005 with the following specs:
- 1.3Ghz Celeron M 350 Processor (x86 Family 6 Model 13 Stepping 8)
- 15" XGA TFT Display (1024 x 768 - 32 bit)
- Intel 82853/82855 GM/GME Graphics Controller (64MB RAM)
- 40GB TOSHIBA MK4025GAS ATA hard drive
- Matshita UJDA760 DVD/CD-RW drive (8x DVD, 24x4x24 CD-WR)
- 256MB of RAM
- 1 PCMCIA slot
- PS/2 mouse port
- Video out
- IEEE 1394 (Firewire) port
- 3 USB ports
- Intel 82801DB-ICH4 I/O Controller Hub
- Realtek RTL8139/810x Family Fast Ethernet NIC (RJ-45)
- Realtek ALC250 (rev 2) AC97 audio chip
- AC'97 Modem Controller (rev 03) with Agere SIL27 codec
- Atheros AR5005GS Wireless Network Adapter (802.11 b and g)
- No legacy parallel or serial ports
- No internal floppy
- I bought mine on sale from CompUSA for $649.99 (with $150 rebate)
 All of the internal hardware is currently supported under this Linux distribution,
although some components require additional configuration or drivers.
Toshiba's frequent offerings have often involved multiple extremely similar models and
incremental (rather than revolutionary) changes from earlier models. As such,
various parts of this document may apply to a wide variety of Toshiba models.
I am providing this information to help others avoid the problems I encountered.
The definitive source for Linux laptop information is the
Linux on Laptops Page.
All of the internal hardware is currently supported under this Linux distribution,
although some components require additional configuration or drivers.
Toshiba's frequent offerings have often involved multiple extremely similar models and
incremental (rather than revolutionary) changes from earlier models. As such,
various parts of this document may apply to a wide variety of Toshiba models.
I am providing this information to help others avoid the problems I encountered.
The definitive source for Linux laptop information is the
Linux on Laptops Page.
This document assumes some minimal UNIX/LINUX knowledge. I provide no guarantees for any procedures stated in this document. If you're using an older distribution, you might find helpful info in my Fedora Core 2 page. You're more than welcome to e-mail me if you've got a problem, but I can't guarantee a prompt or helpful reply. Like many things in the Linux world...you're on your own. I would, however, appreciate any errata that you can point out so I don't mislead anyone else.
2. Memory Upgrade
 This machine ships with 256MB of memory, of which 64MB is shared with the video chip.
A memory upgrade will improve performance dramatically, especially with memory intensive
applications like OpenOffice and Gimp. Memory can be purchased from numerous vendors
online and comes on small SODIMM boards. In 2007, 256MB cost $30 and 1GB costs around $100.
Although the machine can accept up to 2GB (two 1GB modules?), for most folks, performance
will be acceptable with a 256MB upgrade (for a total of 512MB) and pretty much optimal
with a 1GB upgrade (1.2GB total). The open memory slot is located in a small, vented
compartment on the bottom of the machine.
This machine ships with 256MB of memory, of which 64MB is shared with the video chip.
A memory upgrade will improve performance dramatically, especially with memory intensive
applications like OpenOffice and Gimp. Memory can be purchased from numerous vendors
online and comes on small SODIMM boards. In 2007, 256MB cost $30 and 1GB costs around $100.
Although the machine can accept up to 2GB (two 1GB modules?), for most folks, performance
will be acceptable with a 256MB upgrade (for a total of 512MB) and pretty much optimal
with a 1GB upgrade (1.2GB total). The open memory slot is located in a small, vented
compartment on the bottom of the machine.
- Unplug the machine
- Remove the battery
- Remove a single screw to remove the compartment cover
- Slide the new package into the open slot - pins first
- As the pins go in, the package will want to move downward and the side clips will snap into place.
- Replace the cover and you're ready to rock
3. Getting Fedora
Fedora is a free version of Red Hat Linux. While supported by the open source community, it is controlled by Red Hat and is very similar to Red Hat's commercial Linux releases. My first Linux installation in 2000 was Red Hat 6.2 and I have used Red Hat on all my laptops since that time.
While not a perfect distribution or the optimal distribution for all users, its a distro I'm familiar with and I see no reason to go changin'. However, it has bloated to nearly unmanagable proportions and has become very corporate in its flavor (EULA, DRM support). You may want to consider a more grassroots distro like Ubuntu or Slackware if you don't need the experience of working with a commercial Linux distro. Full disclosure - I also have a small amount of money invested in Red Hat.
Fedora is available from the Red Hat Fedora website (and a number of mirror sites) as ISO image files that can be used to burn six CDs or a single DVD. Since I don't have a DVD burner, I chose the CD route. The installer is the same, it's simply a matter of having to babysit a CD installation to change disks.
4. Splitting your Windoze Partition
This machine comes with Windoze XP Home Edition (tm) preinstalled on a single NTFS partition. Since the supplied installation CD will only contains a ghost image to completely rebuild the drive the way it shipped from the factory, you will have to use NTFSRESIZE and FDISK to get the existing partition resized and space freed up for the Linux partitions.
This the most precarious and unpleasant set of tasks in Linux installation on this machine. If you want to have a Linux-only, Windoze-free system, you can skip this section.
Download ntfsresize: The ntfsresize utility can be used to split an NTFS partition. Some distributions come with ntfsresize integrated into their installers, but Fedora does not. You should download the statically-linked binary, which should have a link on the ntfsresize info page. (old link here). Decompress the tarball (tar -zxvf) and burn ntfsresize onto CD. If you have an external floppy drive you can also copy ntfsresize to a floppy. USB flash drives will not work with Red Hat Linux rescue mode (no usb-storage driver), although if you use a CD distro like Knoppix for this procedure, you can save yourself a CD.
Defragment: Boot up into Windoze and run the Disk Defragmenter to defragment your hard drive. The utility is located in Programs -> Accessories -> System Tools -> Disk Defragmenter. If you haven't done much on your Windoze partition, this should complete in under five minutes. Supposedly this step is no longer necessary, but you may want to avoid taking unnecessary chances.
Change Boot Order: As you're rebooting, press F12. This will allow you to select the CD-ROM as the boot device. You also have the option of going into the PhoenixBIOS Setup Utility and moving the CD-ROM first in boot order.
Boot Into Linux Rescue Mode: Insert the Fedora installtion CD #1 into the CD drive and reboot. When you get a boot: prompt, type
boot: linux rescue
When asked, you can skip to the command shell without mounting the existing partitions.
Mount the ntfsresize CD: Remove the Fedora installation CD and insert the CD you created that contains ntfsresize. Although the kernel supports the CD drive, the device file must be created in order to mount the CD.
	sh-2.05b# mkdir /cdrom
	sh-2.05b# mknod /dev/hdc b 22 0
	sh-2.05b# mount /dev/hdc /cdrom
Verify Hard Drive: Verify with FDISK that Linux is seeing the hard drive.
sh-2.05b# fdisk -l /dev/hda
You should get something like this, showing the single bootable NTFS partition:
	   Device Boot    Start       End    Blocks   Id  System
	/dev/hda1   *         1      4864  39070048    7  HPFS/NTFS
Find the Split Location: Use NTFSRESIZE to find out where you can split the partition. If everything is good, you will get a message indicating where to split
	sh-2.05b# /floppy/ntfsresize -i /dev/hda1

	You could resize at 5819277312 bytes or 5820MB (freeing 34188MB)
NTFSRESIZE will warn you if there is a problem. If you plan on using your Windoze side for anything non-trivial, you should leave some extra space for data and new programs.
Do a Test Run:
	sh-2.05b# ./ntfsresize -n -s7000M /dev/hda1

	The read-only test run ended successfully.
I didn't have a problem, but if you get one, you should probably not ignore it, or you will mess up your Windoze installation.
Resize the Partition: The -s option is the size in MB of the new partition. You should use whatever number you got from the earlier run of ntfsresize. You will get one additional prompt to verify you want to continue and you should get a completion message in a minute or so.
sh-2.05b# /floppy/ntfsresize -s7000M /dev/hda1
Start FDISK: Finally, we repartition with FDISK. Be careful here as a mistake will corrupt your hard drive, forcing you to have to reinstall Windoze and start from the beginning.
Start fdisk and use the "p" command to list the current partitions:
	sh-2.05b# fdisk /dev/hda

	Command (m for help): p
Delete Windoze Partition Entry: You should get a listing of the first and only partition: /dev/hda1. Delete it with the "d" command. If any other partitions are listed, delete them as well.
Command (m for help): d
Recreate the Smaller Windoze Partition Entry: Create a new primary partition for the Windoze partition you resized earlier. It should be the same size as the resize value. Note the + before the size.
	Command (m for help): n
	Command action
	   e   extended
	   p   primary partition (1-4)
	p
	Partition number (1-4): 1
	First cylinder (1-4864, default 1): 1
	Last cylinder or +size or +sizeM or +sizeK (1-4864, default 4864): +7000M
Modify its type to NTFS (type 7) and make it the boot partition ("a" command)
	Command (m for help): t
	Partition number (1-4): 1
	Hex code (type L to list codes): 7
	Changed system type of partition 1 to 7 (HPFS/NTFS)

	Command (m for help): a
	Partition number (1-4): 1
Create A New Partition With Free Space: Create a new partition for the remaining free space on the drive. You need to create this partition, or Windoze will undo your resizing and stick it back onto the first partition.
	Command (m for help): n
	Command action
	   e   extended
	   p   primary partition (1-4)
	p

	Partition number (1-4): 2
	First cylinder (1096-4864, default 1096): (choose default)
	Last cylinder or +size or +sizeM or +sizeK
		(1-4864, default 4864): (choose default)

	Command (m for help): t
	Partition number (1-4): 2
	Hex code (type L to list codes): 7
	Changed system type of partition 2 to 7 (HPFS/NTFS)
Verify and Write: List the partitions with the "p" command. You should see a listing of the two partitions with the dimensions you specified. If you're satisfied, make the committment and write the new partitions:
	Command (m for help): p

	Device	   Boot	Start	End	Blocks	   Id	System
	/dev/hda1  *	1	1095	8795556	   7	HPFS/NTFS
	/dev/hda2  *	1096	4864	30274492+  7	HPFS/NTFS

	Command (m for help): w
	The partition table has been altered!

	Calling ioctl() to re-read partition table.
	Syncing disks.
Reboot: CTRL ALT DELETE to reboot to Windows to check everything is right . CHKDSK will automatically run when you reboot and Install New Devices will run at startup to assign the new drive letter. If everything is good in Windoze, you can move on to the installation.
5. Installing Fedora
The Fedora installer (Anaconda) is relatively straightforward and should require no special concerns if you have some basic Linux knowledge. Graphical installation works fine with this video chip. I am including my choices here for your reference
Media check: May be advisable since you don't want to find out disk 3 has a problem after your old OS has been blown away
Welcome screen
Language selection - English
Keyboard configuration - U.S. English
Disk Partitioning: Remove linux partitions on selected drives and create default layout. Be sure to check "Review and modify partitioning layout".
Disk partitioning setup: Manually partition with Disk Druid
Disk setup: Assuming you have two existing partitions after splitting your NTFS partition, you can delete /dev/hda2 and use the free space to create your Linux partitions. My partition table is as follows. The swap space sizing was recommended by the installer (around 2x my RAM of 512MB). I choose to use separate root and /home partitions (to permit easier recovery in the event of a disk problem) and do not use Logical Volumes (which are of value primarily to multi-user systems).
	/dev/hda
		/dev/hda1		ntfs	 6676MB
		Free				    7MB
		/dev/hda2	/boot	ext3	   94MB
		/dev/hda3	/	ext3	 4997MB
	/dev/hda4 (extended - inserted automatically)
		/dev/hda5	swap		  957MB
		/dev/hda6	/home	ext3	25423MB
Installation type: Custom gives you the most flexibility
Boot Loader Configuration (default): GRUB on /dev/hda with default boot to Fedora Core on /dev/hda3.
Network Configuration (default): eth0 with DHCP (default)
Time Zone: Wherever you go, there you are.
Set root password: Mixed upper/lower case with numbers and symbols are harder to hack than "password".
Installation Applications: Choose office, software and web and "customize now".
Package Group Selection: Your choices will vary. Although later installation of needed software is relatively straightforward, you will invariably discover missing packages when you don't have time or the disks to deal with it. So, you may want to take a little extra time here and go through each of the package groups to choose carefully.
About to Install: Installation time will depend on your package selection. Mine took about 30 minutes and used all five CDs. The "Remaining Time" values given by the installer are unreliable. When installation is complete, the CD will eject and the system will reboot.
6. Post-Installation Tweaks
After completion of installation, Anaconda will reboot the system and execute the /etc/rc.d/init.d/firstboot script to do some minimal system configuration. You can avoid this process by either rebooting from a CD and deleting / renaming the script or by hitting CTRL-ALT-BACKSPACE to kill X when the license agreement comes up.
License Agreement: Red Hat goes corporate. Not sure what happens if you disagree.
Firewall: Trust nothing.
SELinux is a NSA project that provides mechanisms for implementing security policies. For simple single-user systems, it's more of a mystery and a pain than anything else, but trying to turn it off here results in a scary message about volume renaming. It does seem to be easier to turn off later (see below).
Date and Time: Where you go, there you are.
Display: Configure the monitor to "Generic LCD Display 1024x768" and modify the display resolution to 1024x768. The video chip (82852/855GM Integrated Graphics Device) is automatically detected. You can modify your display installation later by manually editing /etc/X11/xorg.conf script yourself (not recommended unless you really know what you're doing) or by using the /usr/bin/system-config-display script.
System User: To preserve system security and integrity, you should spend as little time as possible logged in as root. Therefore a new user should be created. You can also add users later from the command line (as root):
	useradd <username>
	passwd <username>
Sound Card: Autodetection of the Intel 82801DB/DBL/DBM (ICH4/ICH4-L/ICH4-M) AC'97 Audio Controller works fine. The audio test provided by the installer doesn't set the volume high enough to hear it, so you can ignore its seeming failure and move on.
Fedora Complete: This will complete the formal Fedora installation process. Additional tweaks are given below.
Touchpad. My personal opinion is that the touchpad is the worst laptop innovation of the last five years. Aside from the fact they're hard to use, I began developing significant wrist problems in the months immediately after getting my first touchpad machine. Unfortunately, almost all laptops are equipped with touchpads nowadays. I purchased a USB trackball mouse that largely alleviated the wrist problems. If a supported mouse is plugged in when installing Linux, it will probably be detected and configured during installation. However, the touchpad will also be enabled. Input devices are located in the /dev/input dirctory and the /dev/input/mice entry apparently aggregates all connected pointing devices. /dev/input/mouse0 is just the touchpad and /dev/input/mouse1 is dynamically assigned to the USB mouse. Edit your /etc/X11/xorg.conf file and change: (reference)
	Section "InputDevice"
		Identifier  "Mouse0"
		Driver      "mouse"
		Option	    "Protocol" "IMPS/2"
		Option	    "Device" "/dev/input/mice"
		Option	    "ZAxisMapping" "4 5"
		Option	    "Emulate3Buttons" "yes"
	EndSection
To...
	Section "InputDevice"
		Identifier  "Mouse0"
		Driver      "mouse"
		Option	    "Protocol" "IMPS/2"
		Option	    "Device" "/dev/input/mouse1"
		Option	    "ZAxisMapping" "4 5"
		Option	    "Emulate3Buttons" "yes"
	EndSection
Unneeded Services. To reduce boot time, improve system performance and enhance security, unneeded services should be turned off. chkconfig can be used to list active services and to turn services on or off:
	/sbin/chkconfig --list
	/sbin/chkconfig <service> on
	/sbin/chkconfig <service> off
Below is a list of services that were turned on by default that I have turned off.
- acpid: unnecessary power management
- apmd: unnecessary power management
- autofs: for automount - which I find annoying
- avahi-daemon: a network service I don't need since I'm not on a network
- bluetooth: this machine isn't bluetooth enabled
- cpuspeed: unnecessary cpu throttling?
- cups: I don't regularly use a printer - leave this if you do
- cups-config-daemon: (ditto)
- gpm: some kind of clipboard handler
- haldaemon: some kind of unnecessary hardware monitor
- hidd: Bluetooth human interface daemon
- hplip: Unused Hewlett-Packard Linux Imaging and Printing service
- irqbalance: Multiprocessor interrupt balancing - unneeded since this is a uniprocessor system
- isdn: ISDN service, which I don't have
- kudzu: Another annoying hardware monitor for non-power users
- mdmonitor: RAID support service
- messagebus: Some kind of application intercommunication service
- netfs: Network file system mounter - unneeded if you're not on a LAN
- nfslock: File locking with network file systems
- portmap: Supports dangerous network RPC calls
- readahead_early: Program preloader. How do you know what programs I'm gonna use!?
- rpcidmapd: More dangerous RPC call support
- rpcgssd: More dangerous RPC call support
- rpcsvcgssd: More dangerous RPC call support
- sendmail: System mail handler - all my mail is handled by an outside server
- smartd: Unnecessary Disk status monitor
- sshd: Permits secure shell login - security risk
Cron Scripts. Within a few minutes of booting Linux, you may notice a flurry of disk activity. If your system stays on for an extended period of time, you may notice similar activity early in the morning (mine starts at 4:02AM). A program called anacron runs system administration programs on a daily, weekly and monthly basis. The configuration file is /etc/anacrontab runs the script /usr/bin/run-parts, which in turn points to the directories containing other scripts, /etc/cron.daily and /etc/cron.weekly. Don't touch tmpwatch (which cleans out unused files in the /tmp directory), logrotate (which cleans up old system logs) or prelink (which prelinks libraries to speed startup time). But there are a number of scripts in here that aren't really necessary, so I moved them to a cron.hold directory:
- makewhatis.cron - keeps man -k references up to date. If you don't change software much, you can just run makewhatis -u manually if you add a man page.
- tetex.cron - deletes unused TeX fonts. Unnecessary if you never use TeX.
- 00webalizer - updates web statistics on web servers
- certwatch - keeps track of security certificates on web servers
- cups - only needed if you have a printer
- mlocate.cron - updates the database for the locate command, which is unnecessary if you don't use locate
- rpm - keeps a system list of installed RPM packages updated. Not necessary.
- squirrelmail.cron - handles SquirrelMail page updates - unnecessary unless on a webserver that hosts SquirrelMail
- yum.cron - Yellowdog Updater Modified - maintain up-to-date RPMs - a bit too Big Brother for me.
- 0logwatch - monitors system logs and sends e-mail on system events. Good for server farms, unnecessary for simple single-user systems.
SELinux Issues: When I compiled and ran the open source media player at XMMS, I got the following error: are compilation issues with contemporary distributions
	/usr/local/lib/xmms/Input/libmpg123.so: cannot restore
		segment prot after reloc: Permission denied
The problem is caused by SELinux restricting the loading of dynamic libraries by programs. (reference) (reference) It's easy to fix by changing the security context of the XMMS libraries:
chcon -t texrel_shlib_t /usr/local/lib/xmms/*/*.so
The problem will also occur with Mozilla plugins and can be fixed with the same command
Alternatively, since this problem may appear for other packages, you can disable SELinux by changing a line in the /etc/sysconfig/selinux file to:
SELINUX=disabled
GLIB / GTK 1.2: XMMS and XCDRoast, among others, use GLIB/GTK for their user interface and may fail with the following message when you try to configure them for compilation:
	*** The glib-config script installed by GLIB could not be found
	*** If GLIB was installed in PREFIX, make sure PREFIX/bin is in
	*** your path, or set the GLIB_CONFIG environment variable to the
	*** full path to glib-config.
	configure: error: *** GLIB >= 1.2.2 not installed - please install first ***
The problem is that the the older v1.2 libraries are not installed, even though the newer glib/gtk+ libraries are installed . The RPMs are spread out across multiple CDs and are interdependent, so you may want to copy them from the CDs to a temporary directory for simultaneous installation:
	mkdir temp

	# insert CD #1
	cp /mnt/cdrom/Fedora/RPMS/glib-1.2.10*.rpm temp
	cp /mnt/cdrom/Fedora/RPMS/gdk-pixbuf*.rpm temp
	cp /mnt/cdrom/Fedora/RPMS/gtk+-1.2.10*.rpm temp

	# insert CD #3
	cp /mnt/cdrom/Fedora/RPMS/glib-devel-1.2.10* temp

	# insert CD #4
	cp /mnt/cdrom/Fedora/RPMS/gtk+-devel*.rpm temp

	rpm -i temp/*.rpm
Logical Volumes: Logical volume management provides a higher-level view of the disk storage on a computer system than the traditional view of disks and partitions. This gives the system administrator much more flexibility in allocating storage to applications and users. On a single user system, it's just more of a headache, so during installation, I deleted the LVM partitioning scheme proposed by the installer and went with a more traditional, old-school approach. However, at boot time there's still a LVM message being issued. It was more an annoyance than a problem, but I edited my /etc/rc.d/rc.sysinit boot file and commented out the following lines:
	if [ -x /sbin/lvm.static ]; then
		if /sbin/lvm.static vgscan --mknodes --ignorelockingfailure
				> /dev/null 2>&1 ; then
			action $"Setting up Logical Volume Management:"
				/sbin/lvm.static vgchange -a y --ignorelockingfailure
		fi
	fi
Flash: Flash (tm) is essential for browsing many websites but the most recent version may not be included with with a particular distribution. However, Flash is freely available for Linux from the Adobe Website. Download the .tar.gz file (not the RPM). AS SUPERUSER, Decompress it and copy the .xpt and .so files into the Firefox plugin directory. Then restart Firefox.
	tar -zxvf install_flash*
	cd install_flash*
	mv flashplayer.xpt libflashplayer.so /usr/lib/mozilla/plugins
7. Motif Window Manager (MWM)
As an old-school Unix guy, I've never found desktops to be the most comfortable way to work. I actually prefer typing commands rather than using the mouse to hunt and peck. Helps the carpal tunnel in my right hand as well. However, X Windows is still essential for graphical applications and useful for multiple terminal windows.
Therefore, I use the very simple Motif Window Manager which is included with OpenMotif, an implementation of the ancient Motif widget set included on the installation CDs in the RPM package openmotif-2.3.0-0.1.9.2. The Motif Window Manager provides, as its name implies, window management capabilities. I use it by itself without the KDE or Gnome desktops. While you don't get a start menu or the ability to leave icons on your desktop, that way of working has always struck me as sloppy anyway. Use of only a window manager speeds boot time and reduces complexity.
.xinitrc is a file that is executed when X is started. Create a .xinitrc in your home directory (/home/<username>) and type the following lines. This creates a single terminal window, puts a clock window at the bottom of the screen, sets the "desktop" color to blue and starts the window manager. When you type "startx", from the text login, it will start an xterm, in which you type commands to start other programs. You can create additional windows from a popup menu when you right-click on the desktop.
	xterm &
	xclock -d -update 1 -geometry +819+710 &
	xsetroot -solid navy
	exec mwm
Text Login. I prefer to see what's going on with my machine rather than have the boot messages hidden behind a glitzy bitmap. Therefore, I have configured my machine to boot in run level 3 (text mode) rather than run level 5 (X windows mode). This will give you a command line prompt for login. The configuration above (with no KDE or GNOME) will do this automatically, but you can do this at any time. As superuser, edit the /etc/inittab file and change the line:
	id:5:initdefault:

	to

	id:3:initdefault:
If you chose text login mode, you will be given a VGA login prompt when you initially boot Linux. After you login, you type startx to start the X Windows desktop. Be aware that the screen will go completely black for a few seconds while X starts.
8. Power Management and Fan
Older laptops used BIOS driven APM power management but most laptops now use ACPI (Advanced Configuration and Power Interface) which requires some software support in the OS for complete support. ACPI handles hibernation/standby as well as the fan and disk shutdown.
The Celeron M processor in this machines runs relatively cool compared to its desktop brethren and the thermostat on the motherboard handles turning the fan on and off pretty well. Because various Linux daemons access the hard drive sporadically, the hard drive is never inactive long enough to spin down. So, ACPI is largely irrelevant on this machine for basic operation.
A kernel module is available for viewing and setting custom functions (like fan and battery status) in this system's Phoenix BIOS. Despite the name, you need the Omnibook kernel module available HERE. When installed, this module provides system files in the /proc/omnibook system directory. Download the kernel module, make install and modprobe omnibook to get it up and running. Full details on the /proc/omnibook/* files are given in the README with the kernel module.
This module can be loaded at boot time by adding the following line to /etc/rc.local:
/sbin/modprobe omnibook
When diagnosing overheating issues, listing /proc/omnibook/temperature will list the current CPU temperature. The CPU automatically shuts down when it gets over 70°C for a few seconds.
The toshiba_acpi module is written for a different BIOS and DOES NOT WORK on this machine.
There is some Alpha level support for ACPI (ACPI4Linux), but it doesn't seem to handle the fan very well. Other features like suspend to disk are not yet supported, so I don't see any reason to have the ACPI daemon (acpid) running. Because the kernel and file system have daemons that frequently write to the disk drive, the disk drive is never inactive long enough to spin down.
To turn the ACPI daemon off:
chkconfig acpid off
Since Centrino M and Celeron M processors do not require as much cooling as their desktop counterparts, they are probably not as susceptable to clogged heat sinks as earlier laptops. However, if you use this machine around pets or in a dusty work environment, you may start to have overheating problems after a few months of operation. There is a cover on the bottom of the machine that can apparently be removed for cleaning, although I haven't had to do this yet. Use extreme caution (or find a trained professional) since it is very easy to mess up your motherboard beyond repair with an electrostatic discharge.
9. Networking and Internet
Ethernet
The Realtek RTL8139/810x Family Fast Ethernet NIC is supported by the kernel with no additional drivers needed. You can use numerous GUIs to configure the card, but the cleanest method is simply to create a /etc/sysconfig/network-scripts/ifcfg-eth0 file with these contents:
	DEVICE=eth0
	TYPE=Ethernet
	STARTMODE=onboot
	ONBOOT=yes
	BOOTPROTO=dhcp
If you are setting up a home network with no DHCP server (or ISP connection) to provide IP addresses, a typical static ifcfg-eth0 file:
	DEVICE=eth0
	TYPE=Ethernet
	STARTMODE=onboot
	BOOTPROTO=static
	IPADDR=172.16.1.1
	NETMASK=255.240.0.0
The interface will be started at boot time with the above configurations. You can also manually bring the interface up or down with the /sbin/ifup eth0 and /sbin/ifdown eth0 commands.
Wireless
The Atheros AR5005GS Wireless Network Adapter (802.11b/g) in this machine is supported by the MadWiFi driver. Supposedly the hardware supports 802.11a, but I guess the MadWiFi driver doesn't support 802.11a, which isn't that important since 802.11a is rarely used. Installation requires a bit of massage...
sharutils: The Makefile uses uudecode for decoding a file encrypted with IEEE Std 1003.1-2001 (uuencode). This utility is included in the sharutils RPM that doesn't seem to be included with the standard installation package groups. The RPM is located on installation CD #3. You can check to see if it is installed with
rpm -qa | grep sharutil
Or just install it from the CD:
rpm -i /mnt/cdrom/Fedora/RPMS/sharutils*
Download / Compile / Install: Download the most recent version of the MadWiFi driver from the website, then unpackage the tarball and make:
	tar -zxvf
	cd mad*
Kludge for Lock-up Problem: A number of users have observed that the MadWiFi kernel module will completely lock up the system when executing modprobe -r, rmmod or performing an ifdown followed by an ifup. Much love to Andargor The Wise for finding a kludge that will solve the problem. In the madwifi directory edit the ath/if_ath.c file and comment out (place a "//") at the beginning of the line that looks like this:
ath_hal_setpower(sc->sc_ah, HAL_PM_FULL_SLEEP, 0);
This is on line 1006 of the version I downloaded - the file date is 5/19/05. There is an ominous comment before this line that indicates why this is a problem. Also demonstrates the value of strategically placed descriptive comments.
	Set the chip in full sleep mode.  Note that we are
        careful to do this only when bringing the interface
        completely to a stop.  When the chip is in this state
        it must be carefully woken up or references to
        registers in the PCI clock domain may freeze the bus
        (and system).  This varies by chip and is mostly an
        issue with newer parts that go to sleep more quickly.
Compile and Install:
make install
modprobe.conf: You should add the following entry to /etc/modprobe.conf so the driver is loaded when you try to bring the interface up:
alias ath0 ath_pci
You can also manually load the module with: /sbin/modprobe ath_pci
Configuration File: While there are numerous GUIs for configuring wireless parameters, it is cleanest just to manually create the configuration files yourself. Network interface configuration scripts are located in /etc/sysconfig/network-scripts and are named ifcfg-xxxx, where xxxx is the name of the interface. The MadWiFI driver creates an interface named ath0, so you should create a /etc/sysconfig/network-scripts/ifcfg-ath0 with the following contents:
	DEVICE=ath0
	NAME=ath0
	BOOTPROTO=dhcp
	ONBOOT=no
	MODE=Managed
	ESSID=xxxxx
The ESSID entry should be set to the SSID of the wireless access point you are trying to connect to. I believe that if you omit this line, the card will simply attempt to connect to the most powerful access point. If you want to know what access points are available you can use the iwlist command:
/sbin/iwlist ath0 scan
Start The Interface: Start the interface with the ifup command. You can bring it down later with ifdown.
/sbin/ifup ath0
The ONBOOT option in the config file (given above) can be set to "yes" to start the interface automatically at boot time, although it is safer to leave it off until you actually need it.
WPA Supplicant
When accessing hotspots that are WPA encrypted (Wi-Fi Protected Access / 802.11i), you will need WPA Supplicant to handle the encryption for the MadWiFi driver. WPA Supplicant is a daemon that is started with the wireless interface to handle roaming and key negotiation with the hotspot's WPA Authenticator. Common encryption technologies supported by WPA Supplicant include WPA2, WPA-PSK, EAP, CCMP, TKIP, WEP104, WEP40, RSN, and PMKSA. Use of the supplicant adds a little extra complexity to starting an interface, but you can throw everything in a simple script so you don't have to think about it.
To install, download the source from the WPA Supplicant Website and follow the installation instructions.
To start the wpa_supplicant daemon, you need a configuration file that is created by the utility program wpa_passphrase using the passphrase for the hotspot you are trying to access. The following script (which must be run as root) brings up the interface, creates a temporary configuration file, starts the daemon and fetches an IP address from the DHCP server. Replace "ESSID" and "PASSPHRASE" with the appropriate credentials for the hotspot you are trying to access:
	/sbin/ifconfig ath0 up
	/sbin/iwlist ath0 scan
	/usr/sbin/wpa_passphrase "ESSID" "PASSPHRASE" > /tmp/wpa_supplicant.conf
	chmod 0640 /tmp/wpa_supplicant.conf
	/usr/sbin/wpa_supplicant -Bw -Dwext -iath0 -c/tmp/wpa_supplicant.conf
	/sbin/dhclient ath0
Dial-up Modem
The internal modem built into this machine is a Winmodem, which is basically a cheap analog telephone interface with the actual modem signal processing provided in software drivers. The Intel 82801DB (ICH4) AC'97 Modem Controller (rev 03) (BCP\VEN_8086&DEV_24C6&SUBSYS_00011179&REV_03\3&61AAA01&0&FE) uses an Agere Systems codec SIL27 subsystem and is supported by the cumbersome slmodem driver, not the slick ltmodem driver.
Download / Compile / Install: Download the most recent Smartlink modem driver (I used slmodem-2.9.11-20060727.tar.gz). Decompress and make:
	tar -zxvf slmodem*
	chmod slmodem*
	make
	make install
Start: As the name implies, the slmodemd uses a daemon that must be started before dialing. You must load the slamr kernel module before starting the daemon. You can include this in a script to simplify connection.
	/sbin/modprobe slamr
	/usr/sbin/slmodemd --country=USA /dev/slamr0
When you start the daemon, it should issue a message like:
	SmartLink Soft Modem: version 2.9.10 Mar 23 2005 11:52:23
	symbolic link `/dev/ttySL0' -> `/dev/pts/2' created.
	modem `slamr0' created. TTY is `/dev/pts/2'
	Use `/dev/ttySL0' as modem device, Ctrl+C for termination.
As the message indicates, the modem device provided by the daemon is /dev/ttySL0.
Dial: Finally, you need a program to dial out and establish the PPP connection. I use wvdial, an excellent, no-nonsense command line program that can be used to test and use the modem. All you need is one simple config file. Given the modem setup above, the following is my /etc/wvdial.conf file. You should modify the username/password to the one given by your ISP. Note the Carrier Check parameter is necessary to use this driver
	[Dialer Defaults]
	Modem = /dev/ttySL0
	Phone = 1-212-202-6884
	Username = (ISP username)
	Password = (ISP password)
	Carrier Check = no
If you prefer a dialer with a GUI, kppp seems relatively popular and also uses the wvdial.conf file.
ALSA: The modem interface is integrated with the sound chip. Both involve analog audio signal processing and this is a cost and space saving design choice. As such, ALSA's snd-intel8x0m module can be used in lieu of the slamr module. However, the --alsa option must then be specified when you start the daemon. I don't know of any advantage to using snd-intel8x0m over slamr, but the option is there if you have a problem or preference.
	/sbin/modprobe snd-intel8x0m
	/usr/sbin/slmodemd --alsa --country=USA /dev/ttySL0
	/sbin/wvdial
The following resources can be helpful for WinModem issues:
10. Windoze Interoperability
XP Partition. If you left an NTFS partition on the drive at install time it is possible to access it READ-ONLY. Fearing the beast, Red Hat has not included the NTFS driver with Fedora. However, installation is simple.
Download: Download from the Linux-NTFS website. The easiest approach is to download an RPM for Fedora 5 - see the special section on the website for Red Hat / FC RPMS. My Fedora Core 5 kernel is 2.6.15-1.2054_FC. Be sure to match the correct kernel version which you can find with:
uname -r
Install:
rpm -i <filename>
Verify the Partition: The NTFS partition is usually /dev/hda1, but you can verify that with
/sbin/fdisk -l /dev/hda
Create a mountpoint:
mkdir /windoze
Add an entry to /etc/fstab (permits read/execute for everyone)
/dev/hda1 /windoze ntfs defaults 0 0
Mount
mount /windoze
Sharing Files with XP: Because the NTFS driver does not provide write access, if you want to be able to share files between Linux and Windoze, one strategy can be to create a separate VFAT partition at installation as a shared space. However, to avoid wasting disk space, I just use a USB flash drive.
Accessing Linux partitions from XP. I am told that there are a couple of utilities that allow you to access a Linux partition from Windoze, although that's a scary thought and I've never tried either of them: fsdext2 and explore2fs.
Booting XP. If you left a bootable NTFS partition when you installed Linux you should have no problem booting XP. By default, GRUB (the GRand Unified Boot loader) loads Linux at boot time. However, you will get a screen briefly at boot time that will allow you to use the down/up arrow keys to select Windoze or Linux as the OS. Press RETURN after making your selection. FYI - the /boot/grub/grub.conf file contains the configuration options for GRUB and you can edit this file to change configuration parameters, such as the OS titles or splash screen displayed when GRUB starts.
Wine. WINE is a Linux Windoze emulator that can be used to run Windoze programs (including office suites). My early experiences were largely unsuccessful but I assume it has matured significantly over the past few years. If you need to run Windoze programs like M$-Turd, Exhell and the Windoze Media Player, Crossover Office from Code Weavers has an implementation of Wine that guarantees successful running of specific software. My modest office software needs are met by Open Office and I urge you make an attempt to divorce yourself from the Evil Empire.
11. True Type Fonts
X Windows supports True Type fonts.
Copy Fonts: Create a new directory at /usr/X11R6/lib/X11/fonts/truetype and copy your TrueType fonts into that directory.
Create Font Configuration Files: Create the fonts.scale and fonts.dir
	cd /usr/X11R6/lib/X11/fonts/truetype
	ttmkfdir
	mkfontdir
Configure font directory: Add the new directory to the "catalogue" section of /etc/X11/fs/config
	catalogue = /usr/X11R6/lib/X11/fonts/misc:unscaled,
        	    /usr/X11R6/lib/X11/fonts/75dpi:unscaled,
	            /usr/X11R6/lib/X11/fonts/100dpi:unscaled,
        	    /usr/X11R6/lib/X11/fonts/Type1,
	            /usr/X11R6/lib/X11/fonts/Speedo,
        	    /usr/share/fonts/default/Type1,
	            /usr/X11R6/lib/X11/fonts/truetype
Get out of X Windows and startx again so X loads the fonts. You can verify loading of the fonts by using the xlsfonts command. Times New Roman is a common font and grep does a search on the output piped from xlsfonts:
xlsfonts | grep "times new roman"
You can also transfer .ttf files from other machines via floppy or CDROM. Note that there are different font files for the italic, bold, bold italic and regular versions of the fonts. Some of the True Type files can be very large so you may need to use multiple floppys. After copying them to the font directory you must run through the subsequent configuration steps again.
TrueType Fonts in Gimp: Gimp (the preferred image editor in Linux) uses the fontconfig font handler rather than the X window system. Therefore, installing fonts for use by X (as described above) will NOT make them available to the text tool in Gimp. The font directories used by fontconfig are listed at the top of the config file /etc/fonts/fonts.conf. The main directory used by this distribution is /usr/share/fonts. Copy your TrueType fonts to a subdirectory under /usr/share/fonts and run fc-cache to load them into fontconfig:
	mkdir /usr/share/fonts/ttf
	cp <your fonts>/*.ttf /usr/share/fonts/ttf
	fc-cache
TrueType Fonts in OpenOffice: Although the OpenOffice Font Troubleshooting Guide indicates that TrueType fonts that are in a path listed by /usr/sbin/chkfontpath should be available to OpenOffice, that doesn't seem to be true. My fonts installed in /usr/X11R6/lib/X11/fonts/truetype are not visible in the OpenOffice font dropdowns. You will need to copy the .ttf files to /usr/share/fonts/openoffice. You do not need to restart X (reference)
12. CD Writing
The built-in CD-RW drive is detected by the installation program and no further configuration is necessary. cdrecord is the program included with Red Hat for recording CDs.
12.1 Data CD
I use the CD-Writer to perform backups of my /home directory. It can, of course, be used to create any kind of CD, but the following instructions are specific to burning a backup CD for a single directory tree.
You can probably put all these commands in a script to simplify CD writing, but I am including explicit commands here for clarity. Because things can go wrong at any step and waste media, you might want to do things explicitly from the console for awhile.
Create the CD image with the mkisofs utility. mkisofs was created when you compiled cdrecord. See the section above for information on compiling cdrecord and installing mkisofs. Supposedly it is possible to pipe the output of mkisofs directly into cdrecord without using an image file. However, every time I tried to do this I got "loss of streaming" errors.
/home/cdimage is an output file from mkisofs that will be used to burn the CD later. This is an arbitrary name...you can put your image anywhere you like (except the directory you're archiving?) [source_directory] is the root of the directory tree that you want to copy. The -r option sets the permissions of all files to be public readable on the CD and enables RockRidge-extensions. The -J option (MS Joliet extensions) can be used to generate a more Windoze friendly CD, but I have had problems with the option yielding the message "tree sort failed".
This will take a few minutes.
mkisofs -r -o /home/cdimage [source directory]
Linux has the ability to mount files as if they were disk partitions. This feature is useful to check that the directory layout and file access permissions of the CD image match your wishes. Once you've tested CD-Writing on your system, this step is unnecessary.
mount -t iso9660 -o ro,loop=/dev/loop0 /home/cdimage /mnt/cdrom
Now you can inspect the files under /mnt/cdrom -- they appear exactly as they were on a real CD. To umount the CD-image:
umount /mnt/cdrom
CD-writers need to be fed with a constant stream of data. The process of writing the CD image to the CD must not be interrupted or a corrupt CD will result. Don't do anything with heavy disk access while writing the CD. Mechanical shock to the writer can also ruin the write. I would reccommend going away and doing something else while the CD is burning...it will take 70 minutes for a full CD.
cdrecord -v speed=8 --dev=/dev/cdrom -data /home/cdimage
Although the writer is capable of 16x writing, I have had problems with buffer underflow at high speed, but speed=8 seems to work consistently.
	Min drive buffer fill was 95%
	Fixating...
	cdrecord: Input/output error. close track/session: scsi sendcmd: no error
	CDB:  5B 00 02 00 00 00 00 00 00 00
	status: 0x2 (CHECK CONDITION)
	Sense Bytes: 70 00 05 00 00 00 00 0A 00 00 00 00 2C 00 00 00
	Sense Key: 0x5 Illegal Request, Segment 0
	Sense Code: 0x2C Qual 0x00 (command sequence error) Fru 0x0
	Sense flags: Blk 0 (not valid)
	cmd finished after 0.002s timeout 480s
	cmd finished after 0.002s timeout 480s
	cdrecord: Cannot fixate disk.
	Fixating time:    0.004s
	cdrecord: fifo had 7474 puts and 7411 gets.
	cdrecord: fifo was 0 times empty and 6772 times full, min fill was 59%.
12.2 Audio CDs
Recording an audio CD is actually a bit simpler than burning a data CD. If you have your audio files all in one directory in .wav format, the following example will burn them all on separate tracks. Since the list will be in alphabetical order, you will need to determine the order of tracks by appending some kind of alphabetical prefix to the track names (i.e. 01_your_song.wav, 02_my_song.wav, 03_his_song.wav, etc.)
cdrecord -v speed=8 --dev=/dev/cdrom -pad -audio *.wav
The recorder records audio CDs at 16x speed, but as with data CDs I have had underflow problems at 16x. speed=8 works well. I have had problems with audio CDs recorded with the speed=1 and speed=4 options. cdrecord completes successfully but the CDs are then unreadable by the CD drive. I thought lowering the speed might remove the potential for error and buffer underflow, but it appears the drive or the drivers don't handle lower speeds well.
Reference:
12.3 CDRDAO
CDRDAO is a command line program for writing CDs in disk-at-once (DAO) mode. CDRECORD on most CD writers will only write in track-at-once mode, turning off the laser between track writes and forcing a 2-second gap between audio tracks (since the stream of pits on the CD stops between tracks). Although this usually does not cause problems, the preferred way to write a CD is disk-at-once as a single stream of pits - to prevent tracking errors and in case you want to send the CD to a duplicator to make bulk copies. CDRDAO provides capability for specifying a number of different parameters for disk writing, including specific timings between tracks, UPC numbers and CD-TEXT (album and track names) for writer drivers that support it.
With this added capability comes additional work in setting up the write. CDRDAO requres a text file that defines what the TOC will look like on the written disk. Although the format for this file is not complicated, it is a bit more work than simply specifying a set of files on the command line, as CDRECORD allows.
The internal CD writer is supported. To write, use the following command. Note that you must be SUPERUSER to write a CD.
cdrdao write --driver generic-mmc --device 0,0,0 toc_file
12.4 DVD Viewing
Fedora does not include a DVD player due to fear of the Fascist MPAA and their expensive lawyers. However, numerous players (mplayer, xine, ogle) are available on the web and the DVD drive on this machine plays DVD's beautifully.
Ogle. Comes in easy-to-install RPM packages. The user interface isn't as pretty as Xine, but it is much simpler and more functional (especially chapter selection). You will need three RPMs: libdvdcss, libdvdread, and ogle. Although Fedora is not mentioned on the home page, you can use the RPMs for Red Hat.
Install the RPMs with the rpm command line program:
	rpm -i libdvdcss-1.2.8-1.fr.i386.rpm
	rpm -i libdvdread-0.9.4-ogle1.i386.rpm
	rpm -i ogle-0.9.2-ogle1.i586.rpm
The ogle command starts the program
ogle /dev/cdrom
There is a config file you can setup as well as a GUI if you're so inclined.
Much love to DVD Jon for enduring all the legal nonsense so the rest of us can play DVDs we bought with hardware we own.
14. Sound / OSS
This machine uses a Realtek ALC250 (rev 2) AC97 audio chip integrated with the Intel 82801DB-ICH4 I/O Controller Hub and AC'97 Modem Controller (rev 03). This distribution includes ALSA (Advanced Linux Sound Architecture) and the sound chip is correctly detected by the installer.
I personally have issues with the complexity of ALSA and prefer the older OSS-Free (Open Sound System), which is still part of the official Linux kernel tree but is not included with this distribution. OSS is simpler, has fewer modules to clutter your lsmod listing and (best of all) is integrated loosely with applications (using filesystem nodes) rather than the the tight integred library scheme of ASLA. Also, I use an Edirol UA-5 USB audio interface, which is not fully supported by the ALSA OSS compatibility layer.
Unfortunately, Fedora's ALSA modules are not part of a removable package and the ALSA libraries cannot be uninstalled because they are integrated with numerous other applications and libraries. However, it is possible to de-alsafy this distro to some extent and enable OSS with the techniques listed below.
Download Kernel Source: Since the Fedora kernel does not have OSS, you will need to get the official kernel from kernel.org. You can do a "uname -r" to determine your exact kernel version.
Download aumix: Since ALSA will be gone, none of the ALSA-enabled mixers will work for controlling the sound chip. AUMIX is a simple command line mixer for OSS. I prefer the command line version, so I configure it without the gtk graphical user interface:
	tar -zxvf aumix*
	cd aumix
	./configure --without-gtk --without-gtk1
	make
	make install
Remove the ALSA Modules: The ALSA modules are located in /lib/modules. As root, move the sound directory outside of /lib/modules (in case ALSA is needed in the future) and recreate the sound directory, leaving only the OSS soundcore.ko module:
	mv /lib/modules/2.6.15-1.2054_FC5/kernel/sound ~
	mkdir /lib/modules/2.6.15-1.2054_FC5/kernel/sound ~
	cp ~/sound/soundcore.ko /lib/modules/2.6.15-1.2054_FC5/kernel/sound
Make the Kernel Modules: Although the kernel source is needed to create the kernel modules, the entire kernel does not need to be rebuilt. Decompress the kernel and go into the sound directory. You may want to do this in /usr/src/kernels (as root) to save the source for later reference or use.
	bunzip2 linux-2.6.15.tar.bz2
	tar -xvf linux*
	cd linux-2.6.15/sound/oss
Two modules are needed to use the chips in this machine: i810_audio.ko and ac97_codec.ko. Rename the Makefile to Makefile.hold (to save it if you ever need to recompile the kernel) and create the following simple Makefile. Kernel modules must be compiled within the source code tree, so this Makefile is recursive:
	all: i810_audio.ko

	obj-m := i810_audio.o ac97_codec.o

	i810_audio.ko: i810_audio.c ac97_codec.c
	        make -C /lib/modules/`uname -r`/build SUBDIRS=`pwd` modules
Compile the modules, move them to the sound directory and load them:
	make
	chmod 0744 *.ko
	mv *.ko /lib/modules/2.6.15-1.2054_FC5/kernel/sound
	/sbin/depmod
	/sbin/modprobe i810_audio
You should now be able to test the soundcard with the audio program of your choice (I prefer xmms) and adjust levels with aumix
Configure modprobe: modprobe will handle loading of the module whenever you access the sound device /dev/dsp. Add an line to /etc/modprobe.conf to load i810_audio, commenting out any lines that refer to ALSA:
	alias eth0 8139too
	alias snd-card-0 i810_audio
	# alias snd-card-0 snd-intel8x0
	# options snd-card-0 index=0
	# options snd-intel8x0 index=0
	# remove snd-intel8x0 { /usr/sbin/alsactl store 0 >/dev/null 2>&1 || : ; };
		/sbin/modprobe -r --ignore-remove snd-intel8x0
Don't confuse activity with progress. (Don Little)