I had been warned that Linux installation was not for the faint of
heart and all the warnings proved justified. Nevertheless, after a long
learning curve I am now under Linux able to do most of the things I did under
Windows. I had only two major problems (dialup configuration and sound), and
solutions for those problems are given below.
The following instructions assume some rudamentary knowledge of Linux
and/or Unix-like systems, although installation on this particular machine is
relatively simple. You will need to know how to edit a text file
before you can dial-up the internet. You'll probably be able to get by
with the KDE text editor.
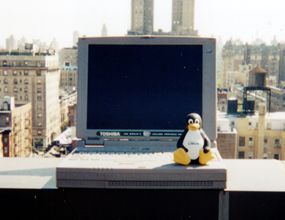
The Toshiba 335CDS is a mid-range laptop built in late 1998 running an Intel
200Mhz Pentium II. It has a 4 Gig hard drive and built-in DVD/CD-ROM drive.
It comes with the standard 32 Meg of RAM which I subsequently upgraded to 64
meg. Upgrades to the maximum of 160 Meg(?) are no longer commercially
available.
The Toshiba 335CDS came with Windows 98 preinstalled on a single
partition. As such, FDISK can't be used to create a partition for Linux. However,
Red Hat (and most other distributions) ship with FIPS (a DOS utility) that permits you
to split your single partition into two partitions.
Since the hard drive on the 335CDS is only 4 Gig, you may want to consider making
your system a Linux only system, as opposed to a dual-boot system that allows you to use Windoze
or Linux. If you only want Linux, you can use the automatic disk partitioning
program that is part of the Red Hat install program and you can skip to
Section 3.
Make sure to perform a backup of any important files on your Windows system. Although
this partitioning process should leave your Windows files intact, it's better to be
safe than Republican. You should then delete any files you don't need and remove any
programs you don't plan to use in the future.
The first trick is getting all of your windows files on the lower part of the
partition so it can be split. Start your computer and allow it to boot into
Windows.
Disable virtual memory from the Windows control panel. I believe the Windows swap
file is kept on the high part of the partition and that's the section that's going
to be moved to Linux
Run the Windows defrag and scandisk utilities from an MS-DOS prompt (so you can use the command
line options). This will move everything down to the lower part of the partition.
When the defrag window comes up, click the SETTINGS button and uncheck the buttons
so you DO NOT rearrange so programs start faster and DO NOT check drive for errors.
Using these command line options speeds up the process: a full defrag normally takes
a few hours, but this one only takes around ten minutes.
You now need to create a boot disk containing the FIPS utility. Insert a blank
floppy and create a bootable CD from an MS-DOS prompt:
You can now insert your Red Hat distribution CD # 1. From the MS-DOS prompt or the Windows Explorer
you can copy the following files from d:/dosutils/fips20/ to your floppy:
Remove the Red Hat distribution CD, but leave the FIPS floppy in the drive
and restart your system. The computer will boot
to a DOS prompt. Type FIPS to start the FIPS utility.
You will pass through a Welcome screen to a Partition screen. You will get a warning about
physical start/end sector not matching logical start/end sector. This is okay,
press any key to accept.
FIPS will gives you new partition table. Type 'c' to continue.
As befits a DOS application, FIPS will crash with a memory allocation error. You can ignore it.
You now have two partitons on your disk and you can start the installation of Linux.
Please be sure to backup any files on the system prior to Linux
installation. The installation described below erases ALL data on the hard
drive.
Immediately after powering on, while the red TOSHIBA BIOS welcome screen is
showing, hold down ESC key. Press F1 when prompted and
the SYSTEM SETUP utility will start.
Change the Boot Priority section (TAB over to it and press the space bar to
change entries) so that CD-ROM comes before HDD in the list.
You can now insert the Red Hat Linux installation CD in the CD-ROM drive.
When you're done just press END and the computer should reboot from the CD-ROM
drive and bring up the installer program. Hit return to chose the graphical installer (the default).
The graphical installer will start afte a minute or two.
The installer will come up using ugly VGA fonts smeared over an SVGA screen,
but that's fine for now.
At this point, if you are doing a Linux-only installation (no Windows), you
can choose automatically partition and skip over the Linux partitioning
process to time zone configuration.
If you're doing a dual-boot system, we need to setup disk partitions. Chose to
"Manually partition with Disk Druid" and click (next).
You will get a list of "Current Disk Partitions". The Windows partition is hda1. Edit it and
make the mount point "/mnt/windows"
Delete the new partition you created with FIPS (hda2 - 2894.5mb). You should
then add the following new new partitions. The "hdax" may come up as different
numbers, but the size and configurations should be the same.
Click (next). When asked to "Choose partitions to format," OK the defaults of hda2 & hda6.
When asked about "LILO configuration" OK the defaults (use linear mode and no special
kernel boot options).
When asked "Where do you want to install the boot loader", choose /dev/hda,
the Master Boot Record (MBR).
LILO config: boot manager...permits configuration of the names used to for booting
the two different operating systems. OK the defaults.
You will be asked for a hostname. This is a name used to identify your computer and is not
terribly significant on a single-user workstation. This is not a user name...those come later.
This name is up to you although shorter (and less vulger) is probably better.
You will be asked for a "Default mouse". Chose "Generic - 3 Button Mouse". This will work
with the accu-point device or any external mouse that you connect later.
Installation is complete. You will need to remove the boot CD after you hit (next) but
before the system begins rebooting.
Having been away from the Unix world for awhile (and never having been a
system administrator), there were a number of things I wanted to be able to do
from the console (rather than through a desktop utility). These are here as a
reminder to me, but if they're helpful to you, great.
When you first boot Linux, you will be presented with a text login prompt (in VGA mode).
When you log in you will get a text prompt. Type "startx" at the prompt to start X Windows
and the graphical desktop.
	Find available disk space

		$ df

	Find a file in a directory

		$ find [directory] -name "[file name (with wildcards)]"

	Format a floppy

		$ /sbin/mkdosfs /dev/fd0

	Create a soft link (i.e. have /home/user/windows directory point to
	/windows/user)

 		$ ln -s

	To Kill X Windows if it gets locked up

		<ctrl><alt><backspace>
The Toshiba Satellite 335CDS shipped with a Xircom CreditCard Modem CM-56T, a 56K
PCMCIA modem that is no longer manufactured or supported by Xircom. Linux automatically
detects the modem, although you may have a problem with it being linked to /dev/modem.
In your KPPP setup, you should use /dev/ttyS3 (described below).
Even though the modem will work with no further configuration, it will perform extremely
slowly. Dave Looney has some experience with the
CM-56T and sent me the following tip to configure the modem port to a higher speed.
As SUPERUSER execute the following console commands.
$ setserial /dev/ttyS3 spd_vhi
You should also edit the /etc/rc.local file (as SUPERUSER) and add this command
to the bottom of the file.
My ISP under Windows was AOL, but at the time of my
conversion to Linux, they were not supporting Linux. I e-mailed customer
support and they sent a form reply about having it in R&D. I needed to get
away from monopolies, but because I travel frequently, I needed a national ISP. I decided
to go with an ISP that a friend of mine recommended...Earthlink.
I dislike giving my credit card numbers on the phone, so I
dialed 1-800-EARTHLINK and the registration process was quick and painless.
After registration, I was told to call tech support (1-800-890-5128) for setup
information. I initially setup my account on Windows and the tech support guy
walked me through the setup under Windows. I don't know what they'll
do for Linux, although I guess they will just give you the raw information and
let you figure out the setup given below.
KPPP is a dialup utility for Linux. It can be accessed from the
application starter->Applications->Network->Dialup.
I initially tried to put a KPPP icon on the panel, but couldn't find a way
to do it. It is possible to put it on the
desktop by copying the link from the Application starter to your desktop (from
the console). The "[user]" is the user name you are logged in as (not
superuser).
$ cp /usr/share/applnk/Internet/Kppp.kdelnk /home/[user]/Desktop
Once it's on your desktop, if you want to put it on the panel (the
application starter bar at the bottom of the screen, you can simply drag it
from the desktop down to the panel bar.
Once you've started KPPP, you will be given a sign-in screen. Choose
"Setup" and "New account." The setup information I used is given below.
Yours will change accordingly.
	Dial tab
		Connection name: ELN/[user name]
		Phone # [access phone number]
		Authentication PAP
		Click off "store password"

	DNS Tab
		DNS Domain Name: ELN/[user name]
		Add DNS IP Address: [xxx.xxx.xxx.xxx - provided by ISP]
		Add DNS IP Address: [xxx.xxx.xxx.xxx - provided by ISP]

	Device Tab (THIS IS IMPORTANT)
		Modem Device: /dev/ttyS3
After setting the modem device, when I tried to test it under the MODEM
tab, I got the message "Modem Busy". I removed the PCMCIA modem and reinserted it
(PCMCIA services gave me beeps to let me know it was detecting my actions). This
apparently solved the problem. You also may need to reexecute the setserial commands
given above, or you will connect at 19KBaud (slow).
When you have changed the setup setting as given above, click OK. This will
return you to the main KPPP screen where you can log in as follows. Note that
hitting ENTER will not automatically connect. You must click the CONNECT button.
connect to: ELN/[user name]
Login ID: ELN/[user name]
Password: [your password]
You can use Netscape Messenger for your e-mail, but I much prefer the KDE
mail program, KMAIL. You can put a new "nickname" on your desktop by right
clicking on the desktop and selecting New->Nickname. The Nickname should be
"kmail" and the target is "kmail".
When you first start Kmail, you will be given a configuration screen. The
following is the information I used, where [user] is your ISP user name, not
your Linux user name (unless, of course, they're the same).
	Identity Tab
		Your Name: [Your real name]
		e-mail address: [user name]@earthlink.net
	Network Tab
		Sending Mail
			Click SMTP
			Server: mail.earthlink.net
			Port: 25 (the default)
		Incoming mail
			Add an account
			When asked for account type: POP3
			There will be an existing server named POP...edit it
			Name: [user name]
			Login: [user name]
			Host: mail.earthlink.net
	Composer Tab
		Click off "Automatically append signature"

	Leave everything else as is and OK
On my initial setup I had no problem receiving mail but Kmail have me an
error message about being unable to open /etc/exim.conf (the sendmail
configuration file). That's because I forgot to click SMTP as the way to send
mail.
The default font sizes in Netscape look awful, so I changed them under
Edit->Preferences->Appearance->Fonts. I changed them to:
	Variable Width Font: Helvetica size 14
	Fixed Width Font: Clean (Schumacher) size 14
If you're still not happy, you can edit the /home/[user]/.Xdefaults file and add
these lines:
     Netscape*DocumentFonts.sizeIncrement: 10
     Netscape*documentFonts.xResolution*iso-8859-1: 90
     Netscape*documentFonts.yResolution*iso-8859-1: 90
You can play with these ratios to get better appearance.
Reference:
http://www.linuxdoc.org/HOWTO/mini/FDU/apps.html#AEN423
Linux is notorious for it's ugly fonts. One of the things Microsoft
actually has done well (and there are a few things) is true type fonts. Linux
includes support for true type fonts in the font server XFS. However, true-type font files
are proprietary so they can't be distributed with the Linux CDs. Since you are
making a system configuration change, you must be SUPERUSER to
perform these commands.
You can get True Type fonts from websites (including Microsoft) and/or from
the /Windows/Fonts directory of a machine running Windoze. You should first create a directory
for your fonts. While this directory name can be pretty much anything you choose,
the one given below is appropriate for the standard LINUX file structure:
$ mkdir /usr/share/fonts/truetype
Transfer them (with a floppy) to this new directory. Note that there are different font
files for the italic, bold, bold italic and regular versions of the fonts.
Some of the True Type files can be very large so you may need to use multiple floppys
and repeat the following steps to copy all the files you need.
	$ mount /mnt/floppy
	$ cp /mnt/floppy/*.ttf /usr/share/fonts/truetype
	$ umount /mnt/floppy
Paths to XFS font files are specified in the configuration file, /etc/X11/fs/config.
However, unlike Red Hat 6.2, there is no default True Type font directory and
you will need to modify the "catalogue" section of this file to point to your new directory.
Your modified "catalogue" section should look something like this. The only change
to the file should be the last line and the comma separator on the next-to-last line.
	catalogue = /usr/X11R6/lib/X11/fonts/misc:unscaled,
		/usr/X11R6/lib/X11/fonts/75dpi:unscaled,
		/usr/X11R6/lib/X11/fonts/misc,
		/usr/X11R6/lib/X11/fonts/Type1,
		/usr/X11R6/lib/X11/fonts/Speedo,
		/usr/X11R6/lib/X11/fonts/75dpi,
		/usr/share/fonts/default/Type1,
		/usr/share/fonts/truetype
Run the TTMKFDIR & MKFONTDIR utilities to build the fonts.dir and fonts.scale files
used by XFS:
	$ cd /usr/share/fonts/truetype
	$ ttmkfdir > fonts.scale
	$ mkfontdir
I tried just restarting xfs and/or X and X gave an error message when
restarting. So, as with all things involving Microsoft products, you will now
need to reboot to restart xfs. When you get back into X, the True Type fonts
should be available.
I initially installed three fonts that are widely used on web pages:
Times New Roman, Arial, and Verdana. You can add more fonts later with
basically the same procedure. Copy the font files (.ttf)
to /usr/share/fonts/truetype, run ttmkfdir, run mkfontdir and reboot.
There is also supposedly a way to convert True Type fonts to Type 1
fonts (http://quadrant.netspace.net.au/ttf2pt1), but since the True Type fonts
work, why mess with a good thing.
References:
	http://www.linuxdoc.org/HOWTO/Font-HOWTO.html
        http://www.linuxdoc.org/HOWTO/Font-HOWTO-4.html
	http://www.redhat.com/mirrors/LDP/LDP/lame/LAME/linux-admin-made-easy/x613.html
	http://www.frii.com/~meldroc/Font-Deuglification.html.
	http://www.linuxdoc.org/HOWTO/mini/FDU/index.html
Before you can use applications with sound (such as the CD player) you
will need to setup sound with the sndconfig program:
$ /usr/sbin/sndconfig
The program will try to autodetect but will be unable to find
the sound card. It will then give you a list of sound cards. Choose:
OPL3-SA2/3/x sound chip
After you select OK you will be asked for sound card settings. Accept all defaults
except "DMA 1", which should be set to 1 - the default is 0.
	I/O PORT: 0x530
	IRQ: 5
	DMA 1: 1
	DMA 2: 0
	MPU I/O: 0x330
	CONTROL I/O: 0x370
After the sound tests (which you should be able to hear) the program will exit.
The CD player and the sound mixer should now work.
The KMID midi player (midi/karaoke player) will also work, but you first
need to select "Yamaha OPL3 FM" (not the external MPU401 port, which is not
connected to anything) in options->midi setup. As you're probably
aware, the FM synth sounds like a toy, but if you're desperate for MIDI, it's
there.
If you have an external Roland Sound Canvas or Yamaha MU-x series MIDI
sound module, you can use the RS-232 serial port to connect to the
module's serial interface. See my
NOTEMIDI page for
more information.
A Real Player 7 is available for Linux. You have to register to get it,
and you download a RPM file that can be installed with RPM. Note that you have
to use the --force option because the Real Player will take over as the default
application for WAV files and there is a conflict in MIME types.
$ rpm -i --force rp7_linux20_libc6.i386.cs1.rpm
The following is a list of my experiences with some applications. It is,
of course, not intended to be exhaustive.
Since KDE 2.0 was in beta at the time RH 7.0 was being assembled, KDE 1.1.2 was shipped
instead. KDE 2.0 incorporates a number of non-essential enhancements, including
the beginnings of a GPL office suite (KOffice) and an almost-full-featured
browser called Konqueror.
KDE 2.0.1 is available via free download. Since this is around 30 MB, this will
take a few hours over a 56K modem. And since there are a separate groups of files to be
downloaded, you will have to pay some attention to the download.
Setting up KDE 2.0.1 is a non-trivial task. Future releases of Red Hat will
undoubtedly contain KDE 2. If you are simply interested in an office suite, I would recommend
spending the $40 to get StarOffice, which is a mature full-featured product.
The download site I used was
Rutgers University, since I'm on the American east coast. Other download sites
are listed on the KDE Homepage. If you have any problem with these
instructions, you may want to consult the
installation instructions in the
downloads section of the KDE site.
Please be aware that the installation instructions are not specific to Red Hat and
are therefore do not accurately describe a Red Hat installation.
The KDE sites get pretty busy and you will probably want to use a mirror
site (like the Rutgers site listed above) for downloads.
Download the following precompiled binary RPM packages:
	qt-2.2.2-2.i386.rpm
	kdeadmin-2.0.1-1.i386.rpm
	kdebase-2.0.1-1.i386.rpm
	kdegraphics-2.0.1-1.i386.rpm
	kdelibs-2.0.1-1.i386.rpm
	kdelibs-sound-2.0.1-1.i386.rpm
	kdemultimedia-2.0.1-1.i386.rpm
	kdenetwork-2.0.1-1.i386.rpm
	kdesupport-2.0.1-1.i386.rpm
	kdeutils-2.0.1-1.i386.rpm
	koffice-2.0.1-1.i386.rpm
	libmng-0.9.2-1.i386.rpm
You should perform this installation from the VGA console (not an X windows console).
If you try to install while running the old KDE, you will lock your system.
Install them AS SUPERUSER with the following commands IN THE FOLLOWING ORDER:
	rpm -ivh libmng-0.9.2-1.i386.rpm
	rpm -ivh --force qt-2.2.2-2.i386.rpm
	rpm -ivh --force kdesupport-2.0.1-1.i386.rpm
	rpm -ivh --force kdelibs-2.0.1-1.i386.rpm
	rpm -ivh --force kdelibs-sound-2.0.1-1.i386.rpm
	rpm -ivh --force kdeadmin-2.0.1-1.i386.rpm
	rpm -ivh --force kdebase-2.0.1-1.i386.rpm
	rpm -ivh --force kdegraphics-2.0.1-1.i386.rpm
	rpm -ivh --force kdemultimedia-2.0.1-1.i386.rpm
	rpm -ivh --force kdenetwork-2.0.1-1.i386.rpm
	rpm -ivh --force kdeutils-2.0.1-1.i386.rpm
	rpm -ivh --force koffice-2.0.1-1.i386.rpm
Finally, you will need to edit /etc/profile.d/qt.csh and /etc/profile.d/qt.sh
and change the definition of QTLIBS from /usr/lib/qt-2.2.0 to qt-2.2.2.
You should now be able to run KDE 2 simply by starting X (the startx command).
Potential Problems
libmng provides support for MNG files - i.e. animated PNG files.
It can also be downloaded from
rmpfind.net. If you have a problem downloading from this site, you
may want to go to the
rpmfind.net libmng page for a list of other download sites. More information on libmng
is available from www.libmng.com.
If you try to install kdelibs without installing libmng, you will get the message:
libmng.so.0 needed by kdelibs-2.0.1-1
If you try to install kdebase without installing kdelibs-sound, you will get the message:
libkmid.so.0 needed by is needed by kdebase-2.0.1-1
The version of QT that ships with Red Hat 7.0 is 2.2.0, but KDE 2 needs 2.2.2.
When I initially tried to start KDE without loading a new version of QT I received
the following error message.
	There was some error setting up inter-process
	communications for KDE.  The message returned by the system
	was:

	Could not read network connection list

	Please check that the "dcopserver" program is running
This error was mentioned on the
KDE bug list, but with the configuration from the good people at Rutgers that includes
the QT 2.2.2, everything ran flawlessly.
StarOffice is an extremely powerful (and somewhat bloated) office suite.
I had some serious problems with StarOffice on a Red Hat 6.2 system, althought
those problems were probably related more to problems with my system configuration
than to kernel or program bugs.
StarOffice is configured to have a complete binary installation for each user.
There is a network installation option, but I had serious problems with it on earlier
installations. I prefer not to have large binaries cluttering up my /home/[user]
directory (to facilitate periodic backups), so I created a directory under /usr/local
and set it up to be owned by my non-superuser username.
	$ su
	(this makes you superuser - you will be prompted for the superuser password)
	$ cd /usr/local
	$ mkdir office52
	$ chown [your user name] office52
	$ chgrp [your user name] office52
	$ chmod 0777 office52
	$ exit
Insert the StarOffice installation disk and run the install program:
 	$ mount /mnt/cdrom
 	$ /mnt/cdrom/linux/office52/setup
When prompted, fill in the appropriate user information when.
When asked for an installation directory, enter the /usr/local/office52 directory
that you created earlier.
OK to start installation. You will be notified that "No Java Runtime Environment
was found." Click OK (Java and JavaScript not supported - the default).
The installation takes around seven minutes on this particular machine.
After the main office program finishes installing and you OK everything, the Adabase
installation program will start running. I didn't need this, so I just hit CANCEL.
StarOffice is located under "Personal" on the KDE application starter.
It takes awhile to boot, especially the first time. You can an icon to the desktop
by copying the link file in the console:
$ cp /home/[user]/.kde/share/applnk/staroffice_52/StarOffice.kdelnk /home/[user]/Desktop
You'll need to restart X. Because it's a user specific installation, you'll
find it in the "personal" category on the KDE application launcher. One of the
first things you'll probably want to do is change the home documents directory
to your /home/[user] directory...otherwise everything will default to a
directory withing the Office52 file structure:
Tools->Options->General->Paths->My Documents
If you need to uninstall StarOffice (see the problem list below), I
think all you need to do is delete /usr/local/office52 and the .office52
directory in your home directory.
Problems:
- StarOffice has an annoying native desktop that is apparently the only way
to access the individual programs. I also had a very serious problem using
this desktop. I used StarOffice for a few weeks and had no problems. But
suddenly, whenever I would open any file, StarOffice would crash with an
"Unrecoverable Error" whenever I closed any file. While StarOffice
saved my files and I did not lose any data, this was certainly not a desirable
way to use the program. Running the StarOffice setup program (K application
starter->personal->StarOffice 5.2->Setup) and choosing the "Repair" option
(repair damaged installation) didn't fix the problem. Uninstalling (see above)
and reinstalling didn't solve the problem. Choosing a non-network installation didn't
solve the problem. I posted a message on the Sun StarOffice news group but had no response.
- I suspected the problem might have occurred because I deleted the desktop
links for new files, tasks, etc. (which I never use). The Repair procedure
given above put them back on the desktop so I guess they're important, but the
problem was still there when I reinstalled and left the desktop alone. Also,
when running StarOffice for the first time, a dialog comes up to ask about an
internet connection, but chosing to or not to use the internet didn't seem to
fix the problem.
- There are some MS Word formatting features (such as vertically centered
sections) that are unavailable in StarOffice.
- You can't import Word Perfect files. If someone is sending you a file
from Word Perfect (which still does happen occasionally), they should export it
to a Windows format (I like .rtf) or you won't be able to open
it.
- The StarDraw vector drawing program is pretty rudamentary and doesn't support
anti-aliasing (giving your graphics that nasty clip-art look).
- The StarDraw vector drawing program doesn't give any control over the size
or resolution when exporting to graphics files. The exported files have 72DPI
resolution but the program seems to convert at 94DPI...i.e. a one inch square
object in StarOffice will be 94x94 pixels in the exported file. I could not
find any configuration option for this. Go Figure.
- The number formats on some of my MS Excel sheets were lost when opened in
StarOffice. StarOffice does not have custom number formats.
To port their office suite, Corel took the easy way out (given their financial
situation, they probably couldn't afford the programming time) and used WINE,
a MS Windows emulator, which slows things down and gives the program a Windows
appearance. There also is some occasional bizzare window behavior
(particularly on maximizing).
Installation is extremely easy and takes around ten minutes. Simply
insert the installation CD in the drive and start the setup.exe program
from the Corel File Manager (which will automount the CD).
The first invocation
of Workperfect took around 2 minutes. I guess there was some first time
initialization, because subsequent startups were much quicker.
GIMP (the Graphics Image Manipulation Program) is an excellent image editor
(like Photoshop) that comes free with most (all?) Linux distributions.
GIMP is invoked by typing "gimp" on a console or using "gimp" as the target
of a new nickname. On your initial startup of GIMP (as each different user)
you will be prompted for an install which lasts only fifteen seconds or so.
My one major issue with GIMP is the absence of a decent native vector
graphics facility. Having used Fireworks under Windows, I got used to having
seamless integration between vector design and bitmap effects and in the
absence of a high-end vector facility to integrate with GIMP, I was forced to
spend $200 on Corel Draw (which I have not loaded on the Toshiba 335CDS
described in this document).
Unfortunately, there is no decent WYSIWYG HTML editor (like Dreamweaver)
for Linux as of this writing.
Although I do not recommend it, there is one commercially available,
WebSphere Homepage Builder v4.0 for Linux, available from IBM.
Unfortunately, it is extremely slow and doesn't handle embedded tables
correctly, so I was unable to use it.
One of the problems is that it was ported from Windows using WINE (a
Windows emulator program. In order to use the downloaded version, you need to
download WINE for Homepage first: http://distribute.soi.wide.ad.jp/wine/
I tried using WINE with Dreamweaver on my
dual-boot system, but I could not even get it to start.
Netscape 4.7 has been a very important program in the Linux movement.
However, it is buggy and has a nasty tendency to crash and hang at inopportune moments.
Netscape 6 is a significant improvement. It is available via an inexpensive CD, but
I prefer not to use my credit card numbers over the phone, so I chose to download it.
You will need to download the installation program from
netscape.com.
The installation program is apparently an FTP client for downloading since you
can't download over a program that's already running.
If you used Netscape to download the installation program, you need to exit
Netscape. Otherwise, the installation will fail.
It will say it completed successfully, but will issue error messages during the installation
(Error [-621]: An installer module (.xpi) failed to install).
Invoking Netscape will then bring up 4.7, not 6.0.
Decompress the installation program it and run it:
	$ tar -zxvf netscape-i686-pc-linux-gnu-installer.tar.gz
	$ cd netscape-installer
	$ ./netscape-installer
The installation program may freeze when you first start it. Just
type <CTRL>-C to kill the program and start over.
The installation download takes about 90 minutes.
When the installation is complete, you will be given a registration box.
DO NOT use your ISP login and password...this is for Netscape's marketing. You might
be able to just hit cancel, but I didn't want to waste my long download time and I
registered.
The new Netscape 6 is installed over the old Netscape 4.7. To start, just type "netscape"
from a console or use any existing Netscape desktop or taskbar icons.
If for some reason you want to return your Toshiba 335CDS to Windows
98, you can use the recovery CD that shipped with the computer.
When trying to restore my 335CDS from recovery CD, Windows 98 asked me for
an authenticity certification number. Having long ago pitched my Microsoft
manuals, I didn't have it. Microsoft now requires a label on the OEM computer
with that number. I discovered, much to my delight that I could
use the certification number from my new computer to certify the recovered
Windows on my old machine.
CD-ROM: TEAC CD-220EA
FLOPPY: Generic NEC Floppy Disk
Hard Drive: Generic IDE Disk Type 01 (Acculogic IDE Controller)
Display: Chips and Tech. 65555 PCI (Toshiba)
Modem: Xircom CreditCard Modem CM-56T
PCMCIA: Toshiba ToPIC97 CardBus Controller
USB: NEC PCI to USB Open Host Controller: IRQ 11, Memory Range FCFFF000-FCFFFFFF
Video Capture: Nogatech-Nogavision
Sound: Yamaha OPL3-SAx Sound System
	I/O Ranges: 0220-022F, 0539-0537, 0388-038F, 0330-0331, 0370-0371
	IRQ 05
	DMA 01, 00
COM1: I/O=03F8-03FF, IRQ 04
LPT1 (printer): I/O 0378-037A, IRQ 07

Partitions: 64M Swap, 16M /boot, 1000M /(root - grow to disk)
Monitor: Generic LCD Panel
X Configuration: Chips & Technologies CT65555
 The following document describes how I set up a
Red Hat 7.0 system on a Toshiba Satellite 335CDS notebook computer. I am providing this
information to help others avoid the problems I encountered when installing Linux on a
335CDS or similar Toshiba notebooks.
The following document describes how I set up a
Red Hat 7.0 system on a Toshiba Satellite 335CDS notebook computer. I am providing this
information to help others avoid the problems I encountered when installing Linux on a
335CDS or similar Toshiba notebooks.
 I provide no guarantees for any procedures stated in this document.
You're more than welcome to e-mail me if you've got a problem, but I can't
guarantee a prompt or helpful reply. Like many things in the Linux
world...you're on your own. I would, however, appreciate any errata that you
can point out so I don't mislead anyone else.
I provide no guarantees for any procedures stated in this document.
You're more than welcome to e-mail me if you've got a problem, but I can't
guarantee a prompt or helpful reply. Like many things in the Linux
world...you're on your own. I would, however, appreciate any errata that you
can point out so I don't mislead anyone else.